Wondering what it’s like to lead a virtual class? Worried about tech glitches or something going wrong? We’ve got you covered! Here are some tips to get you up and running with your first virtual studio – let’s ROCK!
1 – Set up a Zoom account.
A basic account is free, and you’ll be able to host 30-minute classes with about 10 minutes of padding for intros and outros, for up to 100 participants/students. If you would like to host longer classes or add on social hours to your classes, you can choose to sign up for a paid ZOOM Pro package which costs about $15 USD per month. Visit http://zoom.us and download the Zoom app to your computer, smart phone or device of choice.
*Note – a tablet or phone will not allow you to share computer sound and is not recommended.
-
-
- Step one – Download!
- Step two – Select ‘Schedule a Meeting’ and add your classes! Give your classes titles, descriptions, dates, times and durations and time zones
- Step three – copy your meeting link (ID and number). Your students will only need that zoom link to join and rock out
- Step one – Download!
-
2 – Decide how you’ll handle Payment and Registrations
-
- WHAT TO CHARGE: Deciding what to charge will be largely dependent on your geographic area (reach out to local studios and gain an idea of what they charge per class for comparison), as well as your specific financial goals and needs. We’ve seen successful Pros charge everything from $3- $30 USD per head, and everything in between! Decide what audience you’re hoping for (Kids? Stay at home moms? Senior Citizens at your local church or hospital?) and think about what they might feel comfortable paying. Many Pros opt for ‘donation based’ classes and ask people to give what they can. As you build out your schedule and test the demand with different pricing, you may even want to build out incentives like class packages or monthly unlimited virtual class options!
- DATABASE TO USE: Collection of student information can be done straight through Zoom and by using your personal Gmail or Yahoo account, but as you grow and want to communicate about new offerings or special events, you may want to look into programs like MailChimp or Constant Contact to help manage your mailing list and communication strategy. (Make sure to get your students permission!)
- HOW TO COLLECT: As far as collecting payment, you can use the following:
- PayPal: Simply download the app, connect your bank account and have your students find you through your mobile number or email.
- Zelle: Simply download the app, connect your bank account and have your students find you through your mobile number.
- VENMO: Simply download the app, connect your bank account and have your students find you through your phone number or QR code.
- You can also use built in social media payment tools, or even robust online platforms that handle class package purchases and booking systems. (MindBody, GymCatch, SportPass etc.) **Both PayPal and Square allow you to send invoices which can be extremely helpful when tracking money owed vs. collected!
- PayPal: Simply download the app, connect your bank account and have your students find you through your mobile number or email.
3 – Set up your space
-
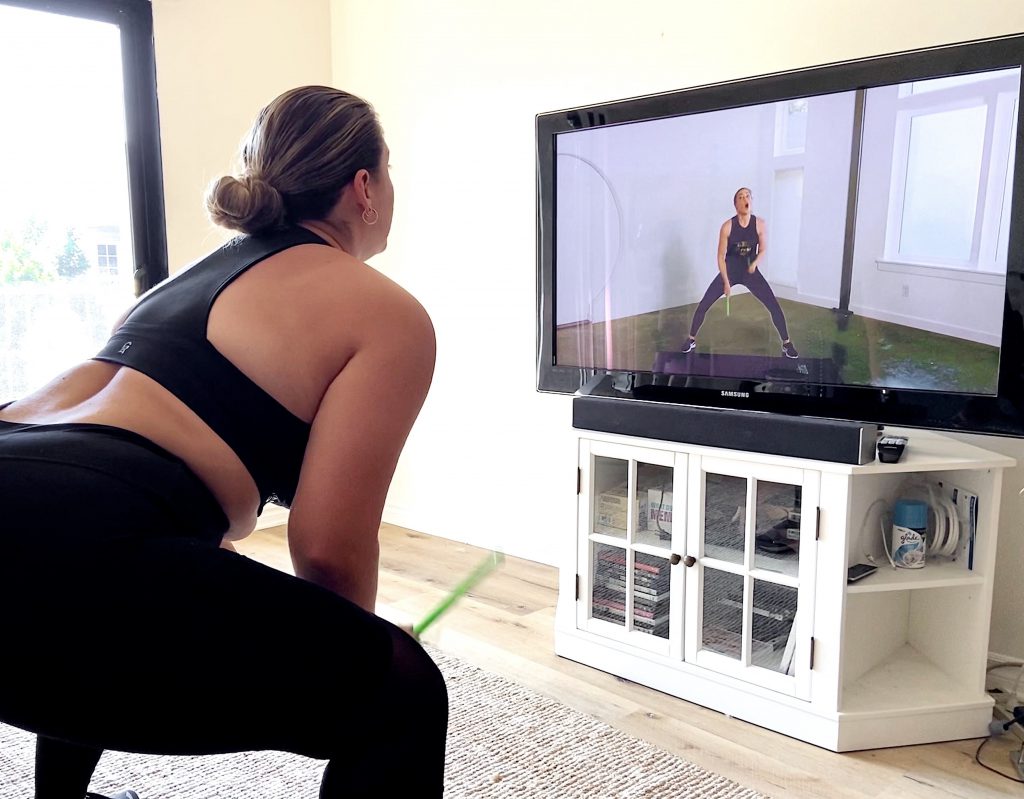
- LOCATION: Whether you are outside or inside, make sure you have enough space to move around, see your Ripstix in a full range of motion in all positions. Tip: start a mock zoom meeting with yourself so you can see how far back you will need to put your mat (great for an anchor point). If you are inside, think about creating a neutral area for you and your students to focus on the fun, the music, and the noise! Moving items that may hinder your movement or focus. You may need a little more lighting than normal as you have the screen between you and your students. Adding extra light or having windows behind the computer versus behind you to create the right amount of atmosphere without drowning you out.
-
- PRACTICE: Set that mock meeting to practice in front of a screen to get used to ‘seeing’ your movements as well as your students. Perhaps grab a friend or family to hop on and practice with you. This will also help build up confidence and anticipate any barriers that may come up. Because there is a screen between you and your students, your energy, tone, cues, and movements will need to be that much higher and bigger. We’ve got those brightly colored Ripstix to help!
-
- TIPS TO KEEP YOUR STUDENTS MOTIVATED AND CONNECTED: from time to time come closer to the screen, acknowledge your students with a point of the Ripstix, a wink, a nod, or a verbal ‘way to go’! Encourage your students to angle their screen during kit and T&A so that they can still easily see you on the other side. Maintaining eye contact just as we would in a live class will go a long way in building those connections with your students (why using a video platform such as Zoom is so important). If you are a parent or have pets that tend to love the music (who wouldn’t), maybe think of times of the day that would work best so you feel your best and can focus on your students.
- TIPS TO KEEP YOUR STUDENTS MOTIVATED AND CONNECTED: from time to time come closer to the screen, acknowledge your students with a point of the Ripstix, a wink, a nod, or a verbal ‘way to go’! Encourage your students to angle their screen during kit and T&A so that they can still easily see you on the other side. Maintaining eye contact just as we would in a live class will go a long way in building those connections with your students (why using a video platform such as Zoom is so important). If you are a parent or have pets that tend to love the music (who wouldn’t), maybe think of times of the day that would work best so you feel your best and can focus on your students.
-
-
- No Ripstix? No problem, knowing how to prepare and practice for this will help ensure an inclusive class. We know the safety and functionality of our Ripstix, however, in a virtual setting if your new students do not yet have a pair, they can purchase Ripstix on poundfit.com. During your intro after you show how to hold Ripstix, show without.
-
4 – Configure your computer settings and get your music ready
Testing sound and visual before is key!
-
- WIFI OR HARDWIRE: Hardwire will allow for a direct and faster connection. It is recommended to hardline your internet connection in with an ethernet cord and device and/or convertor for the *fastest* connection speed during any time of the day. We recommend a USB to ethernet convertor and they can be found for a low cost on amazon or at your local electronics store. Ethernet cords can also be purchased on Amazon and have varying lengths of 1 to 100 feet. The cord plugs directly into your router and the other end should be plugged either directly into your device or a convertor into your device. This cord will establish the strongest connection to your internet provider, hence the word “hard-lined.” If you need to connect via a wifi connection, it is recommended to have at least 40 Mbps for streaming (to check speed, click here or google ‘internet speed test’)
- WIFI OR HARDWIRE: Hardwire will allow for a direct and faster connection. It is recommended to hardline your internet connection in with an ethernet cord and device and/or convertor for the *fastest* connection speed during any time of the day. We recommend a USB to ethernet convertor and they can be found for a low cost on amazon or at your local electronics store. Ethernet cords can also be purchased on Amazon and have varying lengths of 1 to 100 feet. The cord plugs directly into your router and the other end should be plugged either directly into your device or a convertor into your device. This cord will establish the strongest connection to your internet provider, hence the word “hard-lined.” If you need to connect via a wifi connection, it is recommended to have at least 40 Mbps for streaming (to check speed, click here or google ‘internet speed test’)
-
- AUDIO SETTINGS:
-
-
- Audio settings: You can find your audio settings on the bottom left of your zoom screen (you will see a microphone icon). Click on the arrow (^) next to the microphone icon and choose ‘same as system’ or ‘computer speakers’ for speakers and microphone. If you are using external speakers, you will want to choose those for speakers (these do not need to be expensive, small but mighty work, ones that plug into your computer’s audio outlet). If you are using a microphone, you will want to choose those for microphone (recommended to get a microphone that is wireless, battery operated, with USB receiver, and options for headset or lavalier).
- Click on the arrow (^) next to microphone icon again and choose ‘audio settings’, uncheck the box ‘Automatically adjust microphone volume’ in the middle of the screen (below ‘Input volume’), this will give you the ability to adjust depending on your mic and increase the input for the mic and decrease the output of the speakers if you cannot hear your voice /Ripstix over the music. Click on ‘Advanced’ tab and ‘disable’ suppress persistent background noise as well as suppress intermittent background noise.
- Audio settings: You can find your audio settings on the bottom left of your zoom screen (you will see a microphone icon). Click on the arrow (^) next to the microphone icon and choose ‘same as system’ or ‘computer speakers’ for speakers and microphone. If you are using external speakers, you will want to choose those for speakers (these do not need to be expensive, small but mighty work, ones that plug into your computer’s audio outlet). If you are using a microphone, you will want to choose those for microphone (recommended to get a microphone that is wireless, battery operated, with USB receiver, and options for headset or lavalier).
-
-
- SHARING MUSIC:
For better music audio and less lag time (movement with the beat), click on ‘Share Screen’ -> ‘Advanced’ (top-center) -> ‘Computer Sound Only’ -> ‘Share.’ This will play your audio directly through your computer so it’s easier for participants to hear. Have your set list ready to go in your music platform such as Itunes, Spotify, etc on your computer.
- SHARING MUSIC:
-
-
- SPOTLIGHT/PIN VIDEO For your students to see you much more easily as you lead your classes virtually, before you begin you will want to spotlight or pin your video. If you hover the mouse over your picture, three little dots will appear in the top right corner. Click that to get the ‘spotlight’ or ‘pin video’ option.
-
-
- MUTE/UNMUTE:
Start your classes as you would in a live class, connecting with your students, maybe use the chat function to welcome your students, see where they are coming from, and share any social information. We like to allow our students to stay unmuted at this point. Before you start class click the ‘Participant’ button this will display all of the people in your class. Click ‘Mute All’ this will ensure the class can only hear the music and you and not the background noise of others. A dialog box will appear with a check mark option to ‘Allow Participants to Unmute Themselves’ leave this checked so you can interact with your posse after your sweat session is over.
- MUTE/UNMUTE:
5 – Add the finishing touches and get ready to ROCK YOUR FIRST CLASS!!
Just like a live class, leading a virtual class will take planning, practice and enthusiastic delivery. Use your tools in The Label to practice as well as list your virtual classes on poundfit.com. Here are some tips for success:
-
- COURAGE: Give yourself courage to take this step with a new platform knowing that, even if there are hiccups along the way, class will go on and people will be understanding! Always smile and keep ROCKING – stay confident, keep learning, and be committed to finding creative solutions! Your Posse and HQ are always there to support you.
- RENAME FUNCTION IN ZOOM: At POUND we value making space for everybody to show up authentically as themselves. One way for us to do this in a virtual environment is by putting the name we’d like to be called if it’s different than what automatically shows up on Zoom or on my registration sheet, or we might want to spell our names phonetically if that helps others pronounce it correctly, or include our personal pronouns (some of the most common in English are she/her/hers, he/him/his, or they/them/theirs).
- There are two ways to rename ourselves. If you’re in gallery view and you hover the mouse over your picture, three little dots will appear in the top right corner. Click that to get the ‘rename’ option. Or down at the bottom of the screen there may be a place to click ‘Participants.’ There you can find yourself and click to select “rename.”
- EXTRAS: As we love to share in our love of POUND, if you have permission, take a group picture to share! This will be another way for you to connect and engage with your students even after your class ends. Don’t forget to remind them of your next class!
- THE LABEL: Make use of all your marketing materials from The Label to help make some serious NOISE – link to ‘promotion section’ in blog #1
- COURAGE: Give yourself courage to take this step with a new platform knowing that, even if there are hiccups along the way, class will go on and people will be understanding! Always smile and keep ROCKING – stay confident, keep learning, and be committed to finding creative solutions! Your Posse and HQ are always there to support you.
One Response
Hiya Can we set up something through our company where we would have our members sign up for the 10/1-15th rock out and we get some type of report?